Let's get stitching!
Beginning January 1st, 2021! A WHOLE YEAR OF STARS!
On the 1st of every month for 1 whole year Natalia will release a FREE YouTube video, teaching you step-by-step how to machine quilt a star quilt block. Natalia will also release a 2nd variation of the star quilt block on Patreon; you can subscribe to Patreon to gain access to those videos here. (Patreon videos are not free.)
What You Will Need
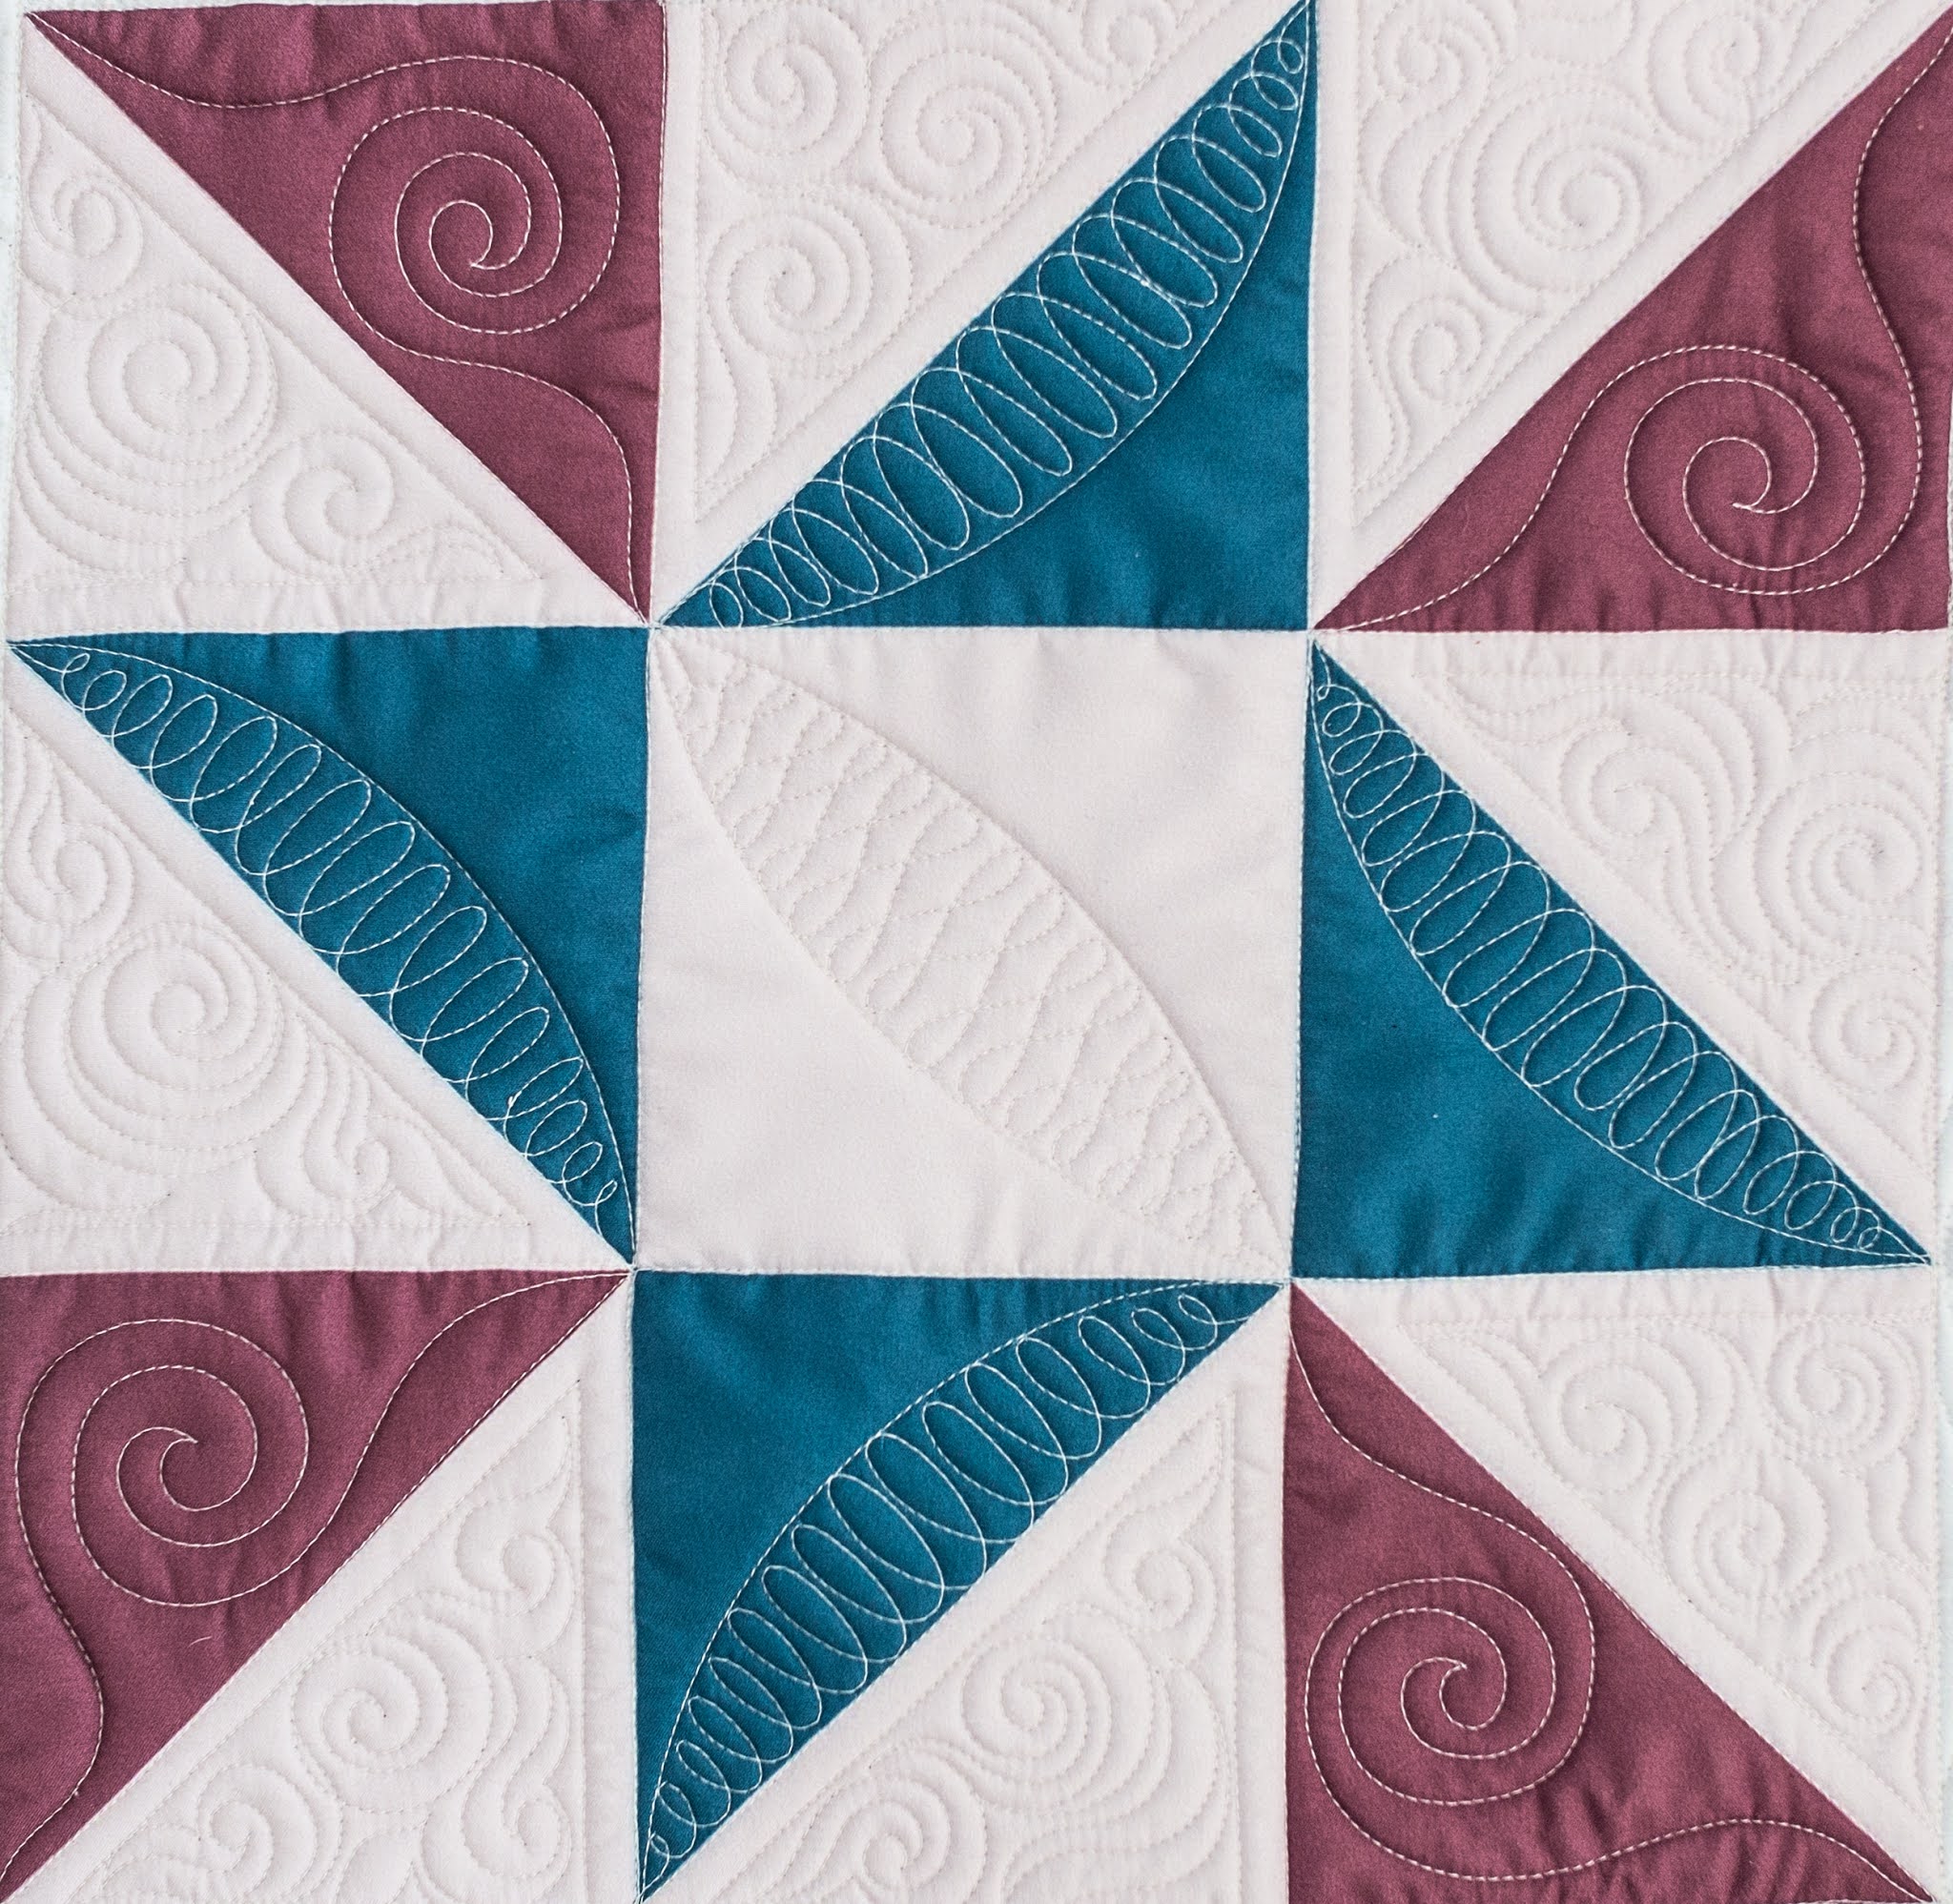
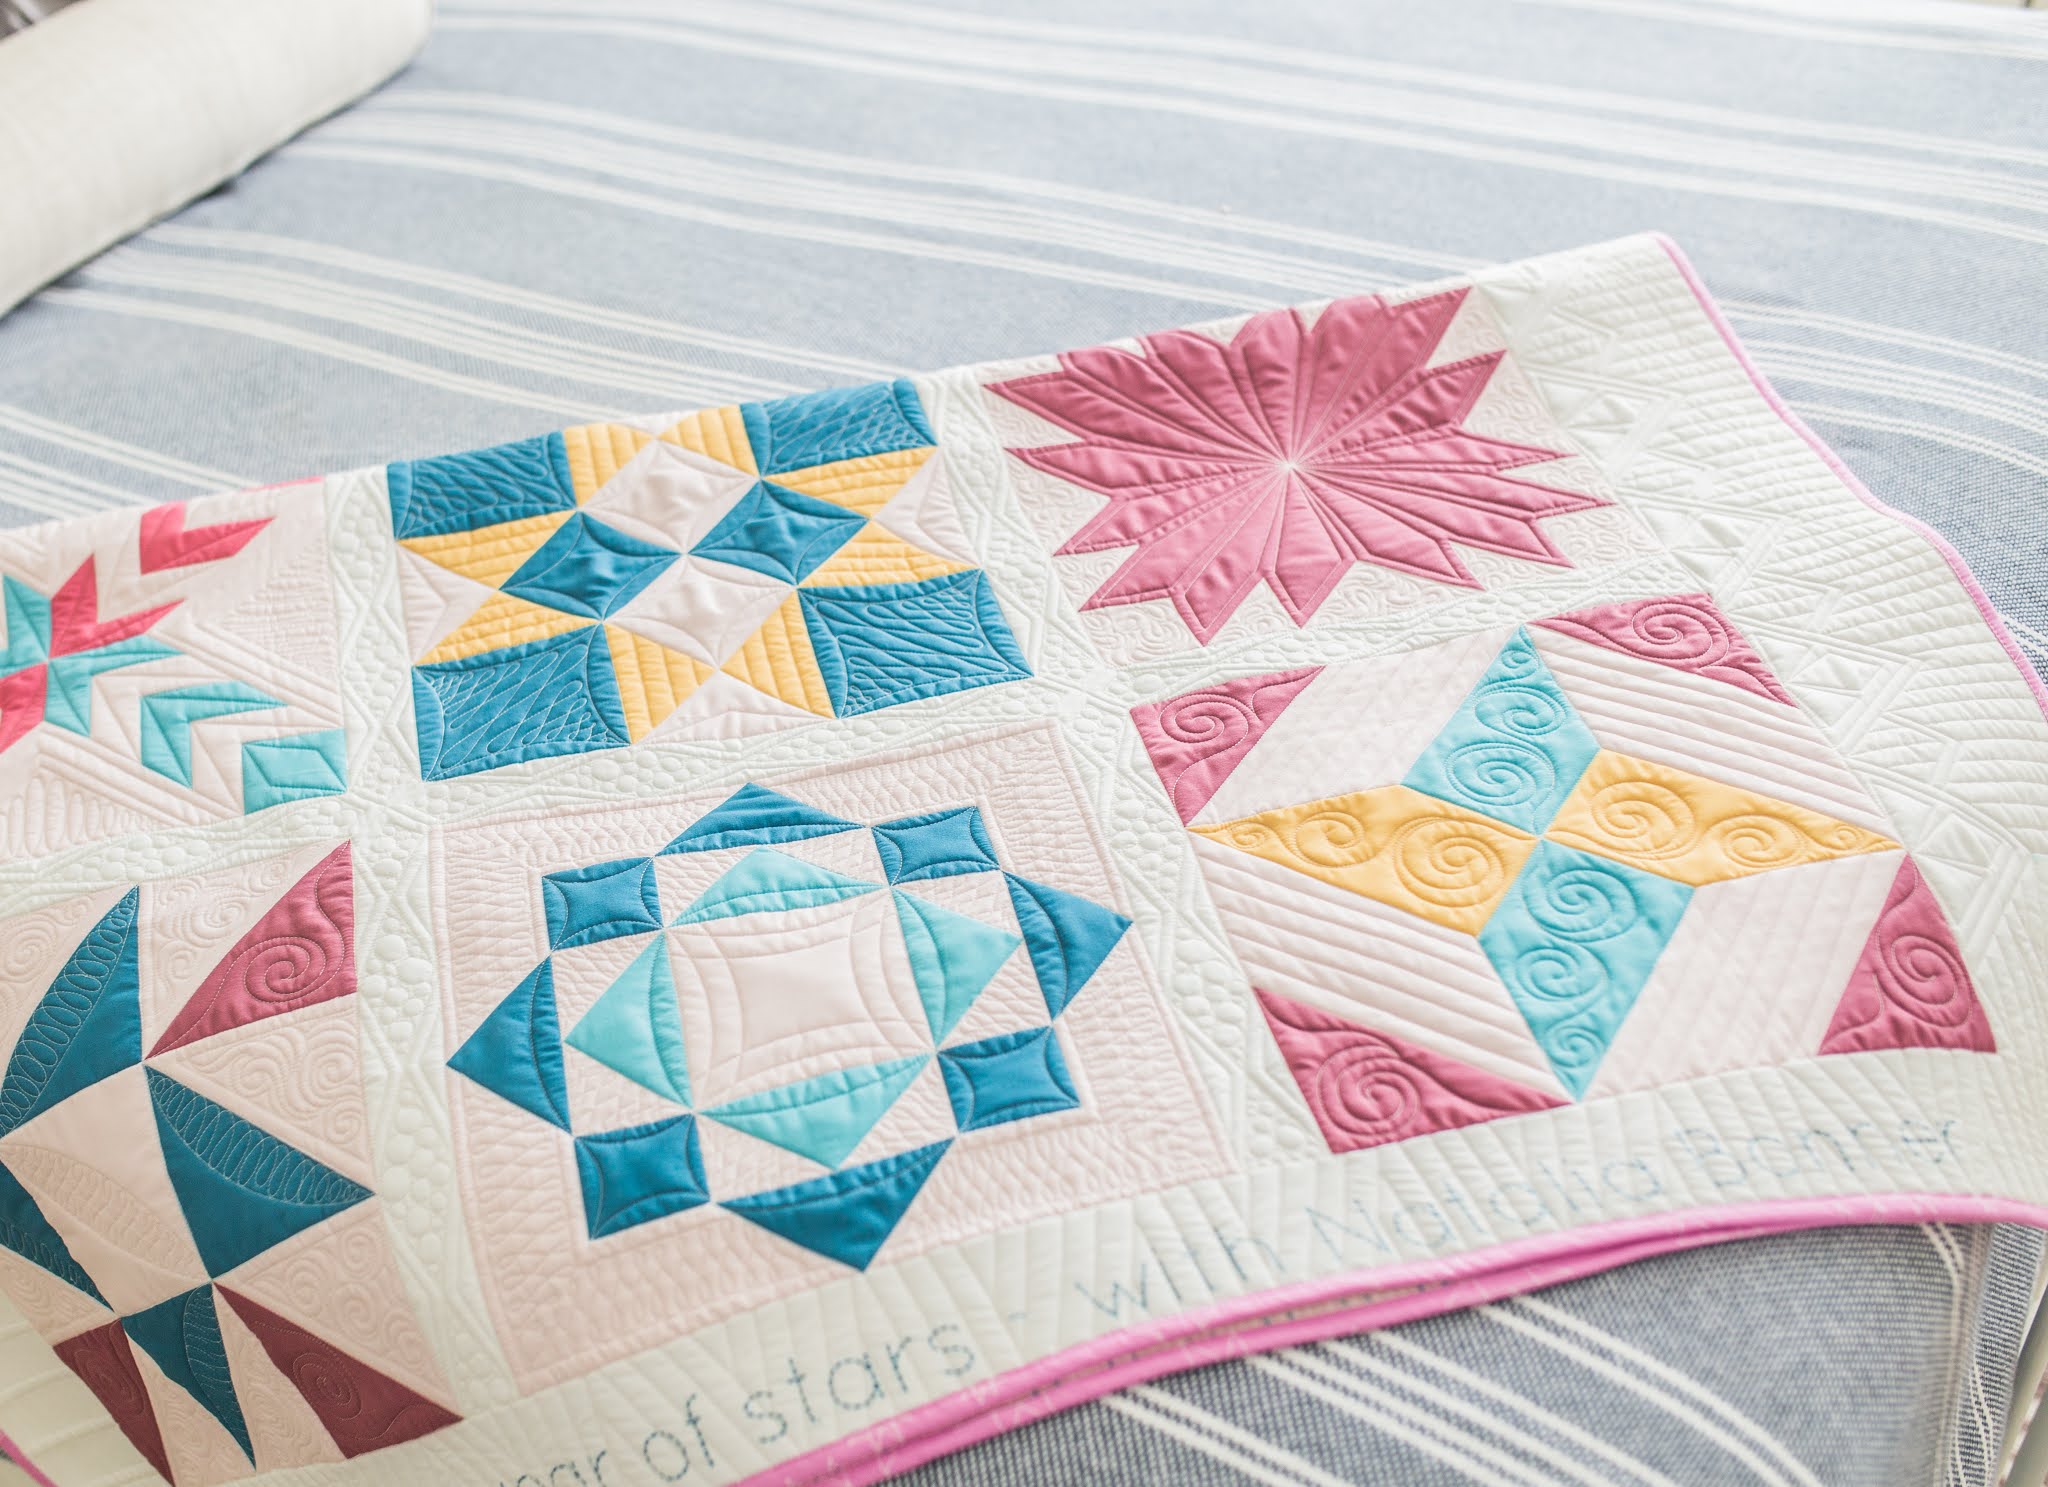
Something to quilt on. Natalia will be quilting all of her designs on a custom Year of Stars panel; you can purchase a panel from Honest Fabric. Natalia will be stitching on the 51"x60" size in the Spring Picnic colorway.
If you prefer to piece your own top, we've got a Year of Stars Piecing workbook available for purchase here.
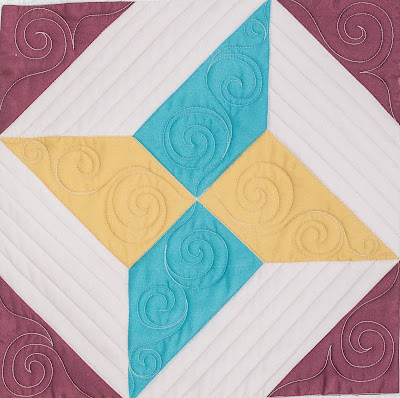
All blocks are finished at 12".
Batting
Natalia will be using 1 layer of Quilters Dream Poly Deluxe Batting.
Rulers
Natalia will occasionally use all five of her machine quilting rulers; however the focus in this stitch-along will be the mini 4-N-1 & mini Inside Out rulers.
Thread
Natalia will use So Fine #401 on the top and Bottom Line #624 of the bobbin.
Marking
Natalia will be doing some marking using the Blue, Mark-B-Gone Marker.
Natalia will mist away her markings using the Misting Spray Bottle.

Where
Facebook & Youtube! FREE video lessons will be posted at 5AM MST on Facebook & YouTube.
Make sure to subscribe to Natalia's YouTube channel to recieve updates when videos are posted.
Join the Facebook group and share your machine quilting progress, interact with quilty friends and win free prizes!
Bundle includes the following:
2021 Year of Stars Calendar - while supplies last
Year of Stars quilt design workbook
Year of Stars Piecing workbook
Quilters Sketchbook
Collectible Year of Stars Mug
Blue, Mark-B-Gone Marker
What blocks will be taught?
(Links will begin working on the first of each month)
January - Combination Star
February - A Dandy Star
March - Union Star
April - Mosaic Star
May - Morning Star
June - Joyces Star
July - Spider Star
August - Midnight Star
September - Large Star
October - Nine Patch Star
November - Bryan's Star
December - Wandering Star
YEAR OF STARS - Sew-along!
Natalia - I'm not a machine quilter but I really want to sew the stars along with you!
December 15, 2020 - December 15 -2021
On the 15th of each month Natalia will release a step-by-step video tutorial sharing her "not perfect" way of piecing the year of stars quilt blocks. Join Natalia on this fun adventure.
Materials needed:
Let's Stitch a Year of Stars Piecing Workbook
Fabrics needed:
18 Fat Quarters to piece the blocks only
or yardage to make the top
Gold - 3/8 yard
Warm Pink - 1/4 yard
Maroon - 3/8 yard
Dark Blue - 3/8 yard
Light Blue - 3/8 yard
Light Pink - 3/8 yard
White - 1 + 1/2 yard
**BUNDLES do not include international shipping on mugs.
**Workbooks are not spiral bound.
Beginning January 1st, 2021! A WHOLE YEAR OF STARS!

On the 1st of every month for 1 whole year Natalia will release a FREE YouTube video, teaching you step-by-step how to machine quilt a star quilt block. Natalia will also release a 2nd variation of the star quilt block on Patreon; you can subscribe to Patreon to gain access to those videos here. (Patreon videos are not free.)
What You Will Need
Something to quilt on. Natalia will be quilting all of her designs on a custom Year of Stars panel; you can purchase a panel from Honest Fabric. Natalia will be stitching on the 51"x60" size in the Spring Picnic colorway.
If you prefer to piece your own top, we've got a Year of Stars Piecing workbook available for purchase here.
All blocks are finished at 12".
Batting
Natalia will be using 1 layer of Quilters Dream Poly Deluxe Batting.
Rulers
Natalia will occasionally use all five of her machine quilting rulers; however the focus in this stitch-along will be the mini 4-N-1 & mini Inside Out rulers.
Thread
Natalia will use So Fine #401 on the top and Bottom Line #624 of the bobbin.
Marking
Natalia will be doing some marking using the Blue, Mark-B-Gone Marker.
Natalia will mist away her markings using the Misting Spray Bottle.

Where
Facebook & Youtube! FREE video lessons will be posted at 5AM MST on Facebook & YouTube.
Make sure to subscribe to Natalia's YouTube channel to recieve updates when videos are posted.
Join the Facebook group and share your machine quilting progress, interact with quilty friends and win free prizes!
Bundle includes the following:
2021 Year of Stars Calendar - while supplies last
Year of Stars quilt design workbook
Year of Stars Piecing workbook
Quilters Sketchbook
Collectible Year of Stars Mug
Blue, Mark-B-Gone Marker
What blocks will be taught?
(Links will begin working on the first of each month)
January - Combination Star
February - A Dandy Star
March - Union Star
April - Mosaic Star
May - Morning Star
June - Joyces Star
July - Spider Star
August - Midnight Star
September - Large Star
October - Nine Patch Star
November - Bryan's Star
December - Wandering Star
YEAR OF STARS - Sew-along!
Natalia - I'm not a machine quilter but I really want to sew the stars along with you!
December 15, 2020 - December 15 -2021
On the 15th of each month Natalia will release a step-by-step video tutorial sharing her "not perfect" way of piecing the year of stars quilt blocks. Join Natalia on this fun adventure.
Materials needed:
Let's Stitch a Year of Stars Piecing Workbook
Fabrics needed:
18 Fat Quarters to piece the blocks only
or yardage to make the top
Gold - 3/8 yard
Warm Pink - 1/4 yard
Maroon - 3/8 yard
Dark Blue - 3/8 yard
Light Blue - 3/8 yard
Light Pink - 3/8 yard
White - 1 + 1/2 yard
**BUNDLES do not include international shipping on mugs.
**Workbooks are not spiral bound.